Wednesday 30 May 2012

Coconut Ladoos with Milkmaid

 The easiest sweets that I have ever made are these coconut ladoos...which are so light, yet so full of flavour & taste that it is difficult to stop at just one...

It has been a hit whenever I have made them and wherever I have taken it....it is so simple to make ...that when anyone asks for the recipe (while thinking that I spent a lot of time & effort on it ) I am almost embarrased to let them know that that is not the case.

This recipe involves only 2 ingredients...when Nestle introduced Milkmaid in India (that is sweetened condensed milk ) - they also came out with a small recipe booklet ....this had a lot of dessert recipes in which their product could be used...had tried out quite a few at the time...and I feel that this is one of their best ...in terms of the simplicity of the process and time involved, and hence has been my all time favourite.

This is very good for festivals, post dinner if you require more than one dessert items, or just to take across to anyone's place when visiting...I have used them for all of the above...and here I go once again making it today to take for an office party.

So anyways to get back ...here's how you go about making it...

Ingredients :

1 can of 400 gms - Sweetened Condensed Milk
250 gms - Dessicated Coconut Powder


Method :

Take a non-stick pan.
Keep aside 50 gms of the coconut powder.
Mix the entire can of condensed milk and 200 gms of coconut powder  into the pan and keep it on a low to medium flame.


Keep stirring continously - do not allow it to brown ( the coconut burns very quickly if not stirred )
Once the mixture starts to come together - this will be in about 5 - 10 minutes - take the pan off the heat and let it cool for about 5 minutes or so.
Put the remaining 50 gms of coconut powder in a large plate.


Make ladoos ( once the mixture has cooled sufficiently enough to hold ) taking small portions and roll between your palms - and then put it immediately in the plate and cover with the coconut powder.
Cool and the store...stays good outside for a couple of days - and in the refrigerator for a week to 10 days.
Enjoy !!!


Coconut Ladoos

This makes 25 - 35 ladoos depending on the size.

Sunday 27 May 2012

Ayubowan....the Sri Lankan experience....and the Avocado Juice


The welcome we receive everywhere in Sri Lanka is very warm and inviting.....Ayubowan with folded hands ....right from the time we board Sri Lankan airlines to embark on our vacation...till the time we come back and deplane  back home...

Ayubowan - wishing you a long life...is used to say hello & bye...it comes from the words, ayu - ayush - life...and bowan - meaning more...

Sri Lanka is a an amazing place from the sea, to the mountains with the tea estates & rubber plantations...winding roads, lakes, calm & peaceful environment in which to relax, unwind, and enjoy all their gastronomical delights...

Some of the sights shown below....is a victory parade held at Galle Face ( in honor of their third anniversary of victory ), Elephant Orphanage ( Pinnawala ), Town Square ( Colombo ), Tea Estates ( Hatton ) ...besides which we visited their Botanical gardens, Gregory Lake ( Nuwara Eliya ), Tooth Relic temple in Kandy ( this is a Buddhist temple holding the tooth of Buddha ), and Ashokawati - Sita temple ( where Sita was kept captive )...all these were truly moving experiences...


Victory Parade


Elephants at the river - Bathing time


Tea Estates

Town Square


The pictures does not do justice to Sri Lanka which is so much more...however it is a small beginning...

Our experiences was varied as we moved to different places - the pace changing from fast to leisurely...the weather from hot & humid ( Colombo ) to pleasant ( Kandy ) to cool almost cold ( Nuwara Eliya & Hatton ) and at each place we were fortunate to sample some delicious Sri Lankan fare...and even though the language was a bit of a stumbling block, seeing as that I did not speak or understand Sinhalese... I did manage to get the sense of what the ingredients of the dishes were and a general idea of how it is prepared...

Well with the blog being related to food...I had to get to it eventually, so here are some of the dishes we had there ...

Rice & curry is the main food eaten in Sri Lanka but there is a lot more in their repetoire ...

Kiribath - Milk rice...basically made of rice, coconut milk..a link given below


A plesant surprise was the juice made from avocados....till now I had had avocado in a salsa ..generally had along with Mexican style dishes ...
Avocado juice - made of avocado pulp, sugar, water, milk - put all in a blender and crush...water should be added to get the consistency required - some have it thicker - so you can eat it like soup - some make it thinner - so you can drink it like juice...
Some use coconut milk instead of regular milk...
But this juice is so amazing - smooth and creamy...it was unbelievable...
Some even make a smoothie with curds and sweetened condensed milk...but given below is the proportions for avocado juice with milk...

Ingredients :
Avocado - 1 - deseed and remove the pulp
Milk - 1 cup
Sugar - to taste...

Put the avocado, milk, sugar in a blender...water can be added to adjust the thickness...


Avocado Juice

Fruits are grown in plenty ( including the above avocado ) - so fruit platter, fruit juices with various combinations of banana, papaya, water melon, mangoes are also available at all places and at all times and they were all delicious...sweet and juicy.

Many of the vegetables and curries are cooked either with coconut or coconut milk and many with coconut oil...it adds a very distinctive taste and flavour to the dishes ...all of which we relished with great joy.


A couple of salads which stood out in taste and simplicity...was cabbage with coconut, green chillies, coriander and seasoning of oil, mustard seed and broken red chilli - and the second salad was made with Brahmi leaves and coconut, again this had green chillies, salt and squeeze of lemon...

Breakfast on one day was transformed into a gastronomical treat with String hoppers and coconut milk sambhol(like curry) and chutney...

Sri Lanka has many different types of hoppers - the string hoppers are like idiappam - made of rice which is ground with a little salt and water and then pressed thru a seive onto small vatis or dishes specially made for making idiappams -this is placed in hot water in a idli container...after it is steamed thoroughly - it is taken out and served with a curry - fish or chicken in case of non-vegeterians and coconut milk curry in case of vegetarians.

For desert we would generally stick with fruit platters...a healthier choice besides being so yummy it was not too difficult a choice...but we did try out some of the other choices ...one of which was their mango pudding.

Mango pudding is made of course from mangoes, condensed milk, gelatin, sugar, hot water...the sugar and gelatin are melted in hot water and then the magoes pulp and condensed milk are mixed in - cool till it sets, then unmold and serve...

I feel I have just barely touched upon the topic of Sri Lankan cuisine...their different chutneys with onions ( cooked and raw )...and the coconut chutneys...and mango curry...and beans veggie cooked with coconut milk, leeks vegetable ( never knew I could so enjoy it )....and another breakfast dish made with millet flour and had with potato curry......


Salad with Brahmi leaves

Mango curry


You can see that I have started drooling....so let me stop here...and hope that you have all enjoyed reading about our culinary experiences...

Thursday 17 May 2012

Healthy hearty bread

The current trend is to eat healthy -anywhere and everywhere you read, there is talk of how to make the food that we eat more healthier, 
There are so many things that are considered bad for you,  that finally we may have to give up eating all together...[ though that may not be so bad, I hear fasting is good for you :) ]

The most confusing part is that the powers that be keep changing the rules of the game...how do we keep it all straight ?

Sometimes it is wine that is bad, now a glass of red is considered good..chocolates were bad...now dark chocolate has the nod...whole wheat flour was considered better than all purpose flour or maida...oh wait...that is still considered  to be so...but now there are a whole bunch of other flours which is said to be better that WWF...millet flour, sourgham flour, soyabean flour, amaranth flour.....

After going through the net I found some recipes for rotis, chapatis with a combination of all these above along with a little bit of  flax seed, sesame seeds, fenugreek seeds all powdered...
tried various combinations and now try to make it the healthy way most of the times.

Then of course the natural progression was from rotis to breads...got some recipe for healthy bread...tweaked it a bit to make it more healthy and also added some fruit pulp, either banana or apple ...along with some nuts ( love the crunchiness in all baked goods )...
This also contains oats ..yogurt, milk and honey ...with so much goodness ....it would be hard to improve upon...but that did not stop me !?
So here's the healthy hearty bread recipe...

Ingredients :

1 cup oats + 2 Tblspns
11/3 cup wheat flour
1 cup AP flour
1 cup yogurt
3/4 cup milk
2 tsps Baking Powder
1/4 tsp Baking Soda
1/4 tsp salt
1 banana mashed
1 egg
1/4 cup honey
1/4 cup oil
1/4 cup chopped nuts - I used almonds

Method:
Preheat the oven to 375 F or 190 C.
Coat a 9 x 5 pan with oil and sprinkle one tablespoon of oats all around it.
Mix the whole wheat flour, all-purpose flour, flax seed, baking powder, baking soda, salt in a bowl with a whisk
Mix all the wet ingredients along with 1 cup of oats.
Mix the flour mixture with the oats mixture stirring gently - do not overmix - put in the chopped nuts, vanilla essence and mix gently.
Pour into the prepared pan and bake for about 50 minutes - 1 hour or till a toothpick inserted comes out clean.
Cool for 10 mins in the pan - and after removing for another 15 mins on the rack.
Enjoy !!!

Tips : You can make it healthier by reducing the oil and adding applesauce.
I reduced the 1 cup of AP flour to 1/2 and substituted the remaining 1/2 with a mix or millet flour, sourgham flour, a tablespoon of soya flour...

Tuesday 15 May 2012

Soups.....& Rachael Ray...

We were talking about food, food blogs, recipes, and the inspiration behind them...the discussion was whether the blog should be only about the recipes...or not...

I was under the impression that the few posts that I had managed to write till date included the people who had been behind the dish...the inspirer so to say...well at least in a couple of them...my writing still being in it's nascent stage...I would get to all eventually..but I was surprised to note that...that was not the consensus...

So I did a rethink...and decided that maybe I could have a post without an actual recipe...difficult but let's try...
Now it is not that tough to write about some of my favourite cooks...esp. celeb cooks ...but could I do a whole post without a mention of any of their dishes...nuhuh...

So here's my post on soups in general and Rachael Ray...why soups you ask ? ....well that was one of the major things that I was inspired from her...it was more the style than the actual ingredients...

Rachael Ray has a 30 minutes show on Food Network Channel in US, where we were based for a few years...and as I was not working at the time...was pretty hooked onto...
I also had the time to cook and try out various new recipes,styles ( indian and others)...and ofcourse experiment with new ingredients too...

I had made soups earlier too...but added a whole new method of preparation...following RR ( short for Rachael Ray )...of putting on the pan - and cutting and dicing in order the ingredients go in...

For e.g. she would take some EVOO ( extra virgin olive oil ) in a pan - then start cutting up onions, garlic, then a bunch of different veggies ( sometimes even non-veg ) and legumes into the pot, add tons of tomatoes, cook till it is all tender...add seasonings...and there you have it an hearty soup or as she called it "stoup" which was one of the words coined by her - to mean something which is thicker than soup but thinner than stew...

She has made up words to better describe her thoughts like ...yum-o being one of them, delish being another...and using first letters short form like the above EVOO...

She has a lot of Italian dishes in her repertoire...so pastas were definitely a part of it...learnt a lot from that too..

So anyways getting back to the soups...I do make them in many different ways, at times I make it the RR method - at times just by pressure cooking some veggies, at times  I leave them in chunks or sometimes I mash them up a bit so we get a thickened soup with bits of veggies or legumes in it...or sometimes I even puree it so that we can have a clear soup...
The ingredients change depending on what I have on hand...but as I said before it was the method that I had learned.


The first time I saw her cutting up garlic by smashing the pod with the flat side of the chef's knife really amused me - I was so impressed with the ease with which she removed the skin thru that process and also managed to make a paste of the garlic...not much chopping was required after she was through with it...( it had no place to go other than the pot )....  :)

The thing I loved more than her recipes is her warm chatty style of presenting...speaking to her viewers like  her friends and  not putting on any airs...she is also very open about her shortcomings ..one of which she mentioned on her show...is that she is not very good at baking....cause she is not good at measuring stuff out...and baking was all about that...
She is more of a "a pinch of this and a dash of that " sort of  person...more used to "eyeballing" it ( in her vocab )...but yet managed to convey the proportions of her dish.

For someone like me, who is just the opposite of the above method....and who loves to measure...so that I am sure of my ground, and the end result...it is surprising that I would watch and love her shows...but watch I did...and appreciated them too...

So here's wishing her all the continued sucess in her shows and life...and may she inspire many more budding cooks.


Sunday 13 May 2012

Panna - Raw Mango Drink


Panna


The hot summer days are once again upon us, and the thing to look forward to the most during this time is mango...whether raw or ripe, the various ways in which it can be had is umlimited and all very enjoyable...

In our childhood this was also the time the schools would be closed for vacation and many time we had gone to our native place to a small town near Udupi...there my grandparents had a farm - with ofcourse mango trees, coconut trees surrounding the farm house - and the pleasure with which we would eat the mangoes grown there ( not the Alphonso variety - but that did not matter to us much )...we would not even wait to cut or peel it ( not sure whether we even washed it ) - the method was to chew off the top portion and squeeze the juice out by sucking it...and simultaneously pressing it from all sides...
By the end of the process - we would have the juice smeared all over our face, chin, running down our hands upto our elbows, and maybe even our clothes...but the pleasure in that ....huuuhhh....just cannot come even close to describing it.

So why do I go down the memory lane...well this year I got some raw mangoes and decided to try my hand at some of the things that we can make using them...so was off on a spree of mango drink, mango salad, mango rice, and mango chutney....all with the green kairi or raw mango...starting with panna - green mango drink.

The sour taste of the kairi mixed with the sweetness of jaggery and the flavour of mint leaves and various seasonings gives us a very cooling and refreshing drink for the hot summer days and sultry nights...and here's how you go about it...

Ingredients:

1 medium to large sized raw mango
5-6 mint leaves
1 tablespoon jaggery - or to taste
1 green chilli
salt to taste
1 tsp rock salt
1 tsp roasted cumin powder
1 tsp chaat masala
3-4 cups of water

Method :

Peel the raw mango, cut into pieces and pressure cook with a few peels ( for added flavour ) .
Remove the peels and cool the cooked mango retaining the water.
In a small jar of the blender, make a paste of the green chilli and mint leaves.
Add the cooled mango, chilli-mint paste, jaggery, and the seasonings in the blender and grind to a smooth paste.
Check the taste and adjust the seasonings if required.
Chill the above paste.
If you add less water while grinding then you can store the paste in the fridge for a long time ( about 7 - 10 days ) and use when required...by adding a few spoons of the paste to a glass, ice, chilled water.
Enjoy !!!

Saturday 12 May 2012

Paneer Bhurji


Today we were in a mood to have something light and different for our meal....the weekends are generally like that - it starts with getting up late,  having dosa or chilla or sabu khichdi or powa...(you get the drift ) for breakfast...

Lunch and dinner also tends to be aloo paratha with curds - or sandwich and soups - idli or rava idli - handwo....etc...

This makes a change from our regular dal, rice, subzi, chapati & salad routine....

Paneer bhurji is one such very light meal - quick to prepare and absolutely yummilicious...is there such a word ? ....if not we should create it....
It can be had as a side to a main meal of course - but it goes very well with toasted sandwich too..

So with that plan in mind ....I asked for extra milk in the morning, we have a very obliging and courteous milkman...and nowadays with the ubiquitous mobile...( everyone ...man,woman, child and pet having one)....it was a simple matter to call at the crack of dawn...I also get a good morning madam from him ( hence the courteous tag )...and got the milk for my paneer...

I love making paneer at home whenever possible...and when that is not so, we have a place where we get fresh paneer which is  very soft and tasty...
But today I was in the mood for some made at home...so as per my earlier post of home made paneer ...made some and then later the bhurji...

Ingredients:

200 gms paneer - soft and crumbled
1 medium onion
1 medium tomato
1 - 2 green chillies as per taste
1 capsicum ( optional )
1/4 tsp tumeric powder
1/4 red chilli powder ( optional )
1/2 cumin seeds
2 tsp oil
Salt to taste


Method :

Heat oil in a pan, add cumin seeds.
When it splutters add chopped onions ( if using capsicum, add at this stage )...
After the onions become translucent, add tomato and green chilli - cook till it becomes soft.
Add the dry powders, salt...you can add coriander powder too (optional )...
Add the paneer after crumbling it...and mix thoroughly...
Let it cook for a couple of minutes covered - sometimes the paneer releases water - if it does - cook till the water is dried up...
Switch off the gas and serve.
Enjoy !!!


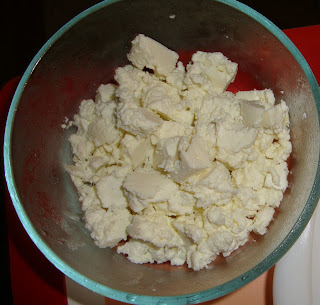
How to make paneer...at home

It's been some days since I last blogged - not that I have not been cooking....but somehow got too busy with other matters....but today I have made paneer and plan to make paneer bhurji, so decided that this requires a mention...

There is nothing like fresh home made paneer ....and it is the most simplest thing to do...esp. if using in a dish like paneer bhurji where it does not even require to be set....it can be used in it's original crumbly form...

So here's how you can make paneer...


Ingredients:


1 litre of milk
juice from 1 lemon or few tsps of vinegar


Method:


Bring the milk to a boil...and reduce the flame.
Start adding the juice of the lemon (or vinegar ) slowly while stirring till the milk separates into whey and paneer...
If it is not completely separated - you could add some more lemon juice...
Sieve the mixture through fine mesh or muslin cloth


In case you need to use paneer in cube form - then at this stage you should cover the paneer in the muslin cloth and press a heavy dish or stone over it for about 1 hour...this enables the water to be removed totally and also hardens the paneer...allowing you to cut it into pieces as required for your dish. You could also refregirate it for a while before cutting it.


However if you need to use for paneer bhurji as I plan to ...then it can be stored as it is just after separating the whey....

This gives about 200 gms of paneer.
Enjoy !!!


Tuesday 8 May 2012

Sukhadi


The aroma of roasted wheat has filled the entire house bringing with it memories of Dasera spent at my sister-in-law's co-sister's place ...confused ?....

Well I am not sure whether it is a common term but in South the term co-sister is used for wives of 2 brothers...so my husband's sister whose brother-in-law's wife ...the one I am referring to here is her co-sister...

Now I think I am confused too....so anyways moving on...let's call her S....we had all gathered at  S's  place for Dasera and she had made the most amazing, mouth-watering Gud papdi or as it is also referred to as Sukhadi...

And even though we are all now conscious of what (& how much )sweets we have ....we could not resist it and it was soon polished off...

I asked her for recipe and have since made it many times with delicious results and here I go making it once more...while it is cooling on the kitchen counter I decided to log it in ...the recipe given below....

Ingredients:

1 cup wheat flour
1/2 cup jaggery
1/2 cup ghee
1/2 nuts powdered - (optional) ( I used a mix of almonds and walnuts )
1/4 tsp cardamom powder
broken cashews to garnish


Method:
1) Melt ghee in a non-stick or heavy bottomed pan

2)Roast the wheat flour and powdered nuts together till it changes colour to reddish brown - it will also give a heavenly aroma at this stage - and you will also see the ghee starting to separate a bit.
This takes about 10-15 minutes approx.


3) At this stage add the jaggery ( jaggery should preferably be grated )
4) Stir till it is all blended well - you will see that the mixture starts coming together - switch of the flame and put the mixture in a greased thali or baking dish.
(After adding the jaggery - you do not have to keep it all flame for long - just till it all mixes in and the mixture comes together - about 1 minute.)


5) Sprinkle cardamom powder over it - cool it for about 10 minutes then cut into diamond shapes...decorate with cut cashew pieces...
6) Let it cool further completely before removing from the pan and storing it in an airtight container...
Enjoy !!!

Tips: You can put a little less ghee if you would prefer - but then you may need to add a couple of tablespoons of milk in the end for the sukhadi to hold it's shape...

The addition of powdered nuts is optional - but it does raise the level of the sukhadi and brings out the nutty flavour of the roasted wheat...besides increasing it's nutritive value.


Sunday 6 May 2012

Spinach Raita

I am always looking to use spinach in dishes...mainly hidden ...as in dhokla, handwo, soup ( blended ) or palak paneer etc...cause leaves in any dish by itself is not eaten at our place...even methi is used with flour to make methi thepla or parathas...though aloo methi is one of personal favourites...love the bitter taste of methi leaves..( though that brings me to  another whole story )....
Spinach Raita


I had been longing to make this dish (spinach raita) ever since I had eaten in at a cousin's place...but as I said was wary of the reaction to it....but I needn't have worried, this turned out so amazing..so creamy and smooth ...with sour, sweet and spicy flavours blending so well to turn into a dish which could be had as a side, as a raita, with the whole meal or actually just by itself with rotis, or parathas....


Ingredients:

1 cup spinach
1 cup curds
1 green chilli
2 garlic cloves
1/2 inch ginger
1/2 tsp cumin seeds
1 dry red chilli
salt to taste
1/4 roasted cumin powder
pinch of asafoetida (hing)
1/4 - 1/2 tsp of sugar - or to taste

Method :

1) Whisk the curds till smooth in a bowl and keep aside.

2) Wash the spinach leaves and chop it fine...take a pan, put about a teaspoon of oil and add ginger, green chilli chopped, fry for a bit and then add the chopped spinach, stir till it wilts about 5 mins...once done take out the spinach mixture and cool it totally before adding it to the curds...

3) In another pan for seasoning the raita -  take some oil, add cumin seeds, once it splutters, add chopped garlic  and the dry red chilli and pinch of asafoetida, stir for a minute and then add to the curds and spinach mixture along with salt to taste and roasted cumin powder and sugar and mix...you can adjust the seasonings according  to your personal tastes.

Serve this raita cold...the above proportions serve 2-3

This dish is both tasty and nutritous...and can be had with both rotis and rice.

Saturday 5 May 2012

First post....Banana walnut muffins

I don't know why I thought I could do this...have been thinking about it for a long time and decided to finally take the plunge...went ahead and started this blog...


Now I am getting cold feet ...it is difficult for me to ramble in print...I am too direct and get immediately to the point...[ it is a different story when I get talking...then there is no stopping me...or so I am told :-) ]


Anyhow...let me not prove myself wrong ( by rambling )...and get to my favourite muffin recipes...starting with banana muffins...they were one of the first things I baked...the recipe was given to me by a very close friend who was an amazing cook...we loved going over to their place for dinner or tea or anything...mmmm....


As a kid I do remember baking a few things with my mother ( bread, cakes ) - we had a very old style dome structure oven...do not remember what happened to it or why we stopped ......but after a very long hiatus I restarted .....and the taste of this moist and absolutely heavenly muffins bought back all those memories...esp. the smell of baking filling the house...making our mouths water, and waiting impatiently for it bake and then cool...so that we could dig in...

So getting back ...here's the recipe that I follow...


Ingredients:


3 large bananas
1/4 cup white granulated sugar
1/2 cup brown sugar or demerara sugar
1 egg
1/3 cup melted butter
1 tsp baking powder
1 tsp baking soda
1/2 tsp salt
1 1/2 cups AP flour
1/2 cup walnuts chopped


Method :


Mash the bananas. Add the sugars, and lightly beaten egg.
Add the melted butter.
Add the dry ingredients.  Fold lightly - do not overmix, add the walnuts and put in muffin tin...bake at 375 for 20 mins...or till a toothpick inserted comes out dry...gives 12 muffins.


The original recipe called for 3/4 cup of white granulated sugar which I have changed as above...you could also use all brown sugar ...and the AP flour could be changed to half of AP and half whole wheat ...this will change the texture and taste of the final product but it still makes a very delicious treat...so go ahead and experiment...